
How do dental labs transform digital blueprints into physical surgical guides that ensure pinpoint accuracy for dental implant placement?
In the world of modern dentistry, guesswork is out, and precision is in. For dental implant surgery, this means a significant shift from freehand techniques to guided procedures. This evolution is largely powered by digital technology and the expert work of dental labs.
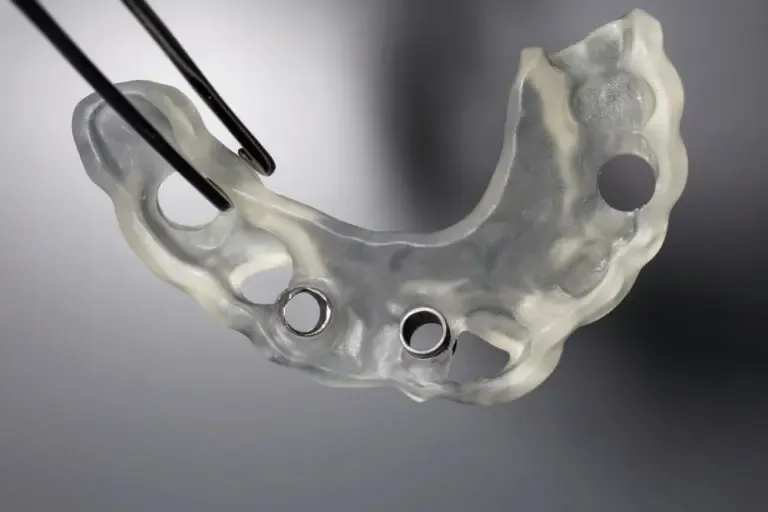
Surgical guides are custom-made templates that fit perfectly over a patient's teeth, gums, or bone during implant surgery. They act as a roadmap, directing the dentist to place implants at the exact predetermined angle, depth, and position. This level of predictability dramatically improves outcomes and reduces risks.
The dental lab plays a pivotal role in this digital revolution. They are the skilled partners who take complex patient data and turn it into the precise tools dentists need. Let's explore the comprehensive process of how dental labs create surgical guides, ensuring predictable results for every implant case.
The Digital Foundation: Acquiring and Preparing Data
Every successful surgical guide begins with accurate digital data. This information paints a complete picture of the patient's oral anatomy, which is crucial for detailed planning.
Gathering the Blueprint: Diagnostic Imaging
The first critical step involves obtaining high-quality diagnostic images. These scans provide the raw data the lab needs to start the design process.
CBCT Scans: Cone Beam Computed Tomography (CBCT) scans are the gold standard. They provide a detailed 3D view of the patient's bone density, the location of vital nerves (like the inferior alveolar nerve), and sinus cavities. This information is essential for identifying safe zones and avoiding complications.
Intraoral Scans / Digital Impressions: Digital impressions capture the precise shape of the patient's teeth and soft tissues. These scans create high-resolution STL (stereolithography) files, which are digital models of the patient's mouth.
Traditional Impressions: For practices not yet fully digital, traditional physical impressions are taken. The dental lab then uses a lab scanner to convert these models into digital STL files, integrating them into the digital workflow.
Data Fusion and Alignment
Once all the necessary scans are collected, the lab technician must combine these different data sets. This process is called data fusion or superimposition.
The CBCT (DICOM files) and intraoral scan (STL files) are merged into a single, cohesive 3D model. This accurate registration ensures that the virtual plan aligns perfectly with the patient's actual anatomy. The lab carefully checks for any discrepancies or artifacts that could compromise accuracy.
Creating the Virtual Patient
The merged digital data is then imported into specialized dental planning software. Leading platforms like 3Shape Implant Studio, exocad, and Blue Sky Plan are commonly used.
Within this software, lab technicians can create a "virtual patient." This digital environment allows them to visualize the patient's anatomy in 3D, perform virtual extractions if needed, and begin the critical process of prosthetic-driven planning.
The Digital Workflow Explained
With the digital data prepared, the lab moves into the design phase, where art meets science to create the perfect guide.
Planning with the End in Mind: Prosthetic-Driven Design
The most effective implant planning starts with the final restoration in mind. This is known as prosthetic-driven planning.
The lab technician begins by creating a virtual wax-up or digital tooth setup, visualizing the ideal position, shape, and size of the future crown or bridge. This ensures the implant will be placed in a position that supports optimal esthetics and function for the final restoration.
Considering Anatomy and Safety
Careful attention is paid to the patient's unique anatomical features and potential risks. The planning software allows the lab to:
- Delineate Nerve Canals: Precisely map the path of critical nerves, like the inferior alveolar nerve and mental foramen, to avoid injury.
- Map Sinus and Nasal Floors: Identify the boundaries of the maxillary sinus and nasal cavity to prevent perforation during drilling.
- Assess Bone Volume and Adjacent Roots: Evaluate the quantity and quality of available bone, and ensure implants are safely distanced from neighboring tooth roots.
Choosing the Right Guide Type
Dental labs offer various types of surgical guides, each suited for different clinical scenarios. The choice depends on the patient's anatomy, the number of implants, and the dentist's preference.
Tooth-Supported Guides: These guides rest directly on the patient's remaining teeth. They offer excellent stability and are commonly used in partially dentate cases.
Mucosa-Supported Guides: Used for fully edentulous patients, these guides sit on the gum tissue. They require careful planning to ensure stability during surgery.
Bone-Supported Guides: Designed to rest directly on the bone, these are often used in cases with extensive bone defects or for full-arch implant rehabilitation.
Specialized Guides: This category includes pilot guides (for initial drilling), fully guided systems (for all drilling steps), stackable guides (for multi-stage procedures), and bone reduction guides.
Collaborative Planning: Dentist-Lab Communication
Effective communication between the dentist and the lab is vital. The lab technician sends the proposed virtual plan to the dentist for review and feedback.
This collaborative approach allows the dentist to confirm the implant positions, angles, and depths, and request any necessary adjustments. Only after the dentist's final approval does the lab proceed with fabricating the physical guide.
From Digital Design to Physical Guide: Fabrication and Finishing
Once the digital plan is approved, the lab transforms the virtual design into a tangible, ready-to-use surgical guide.
Designing the Surgical Guide in Software
Within the planning software, the lab technician designs the physical guide itself. This involves defining specific parameters:
- Guide Thickness and Windows: Ensuring the guide is robust enough for surgery while allowing the dentist to visualize the surgical site.
- Drill Sleeve Integration: Precisely positioning the drill sleeves (metal cylinders) within the guide. These sleeves direct the drills, ensuring accurate implant osteotomy.
- Exporting the Design: The completed guide design is exported as an STL file, which is the standard format for 3D printing.
3D Printing the Guide: The Heart of Fabrication
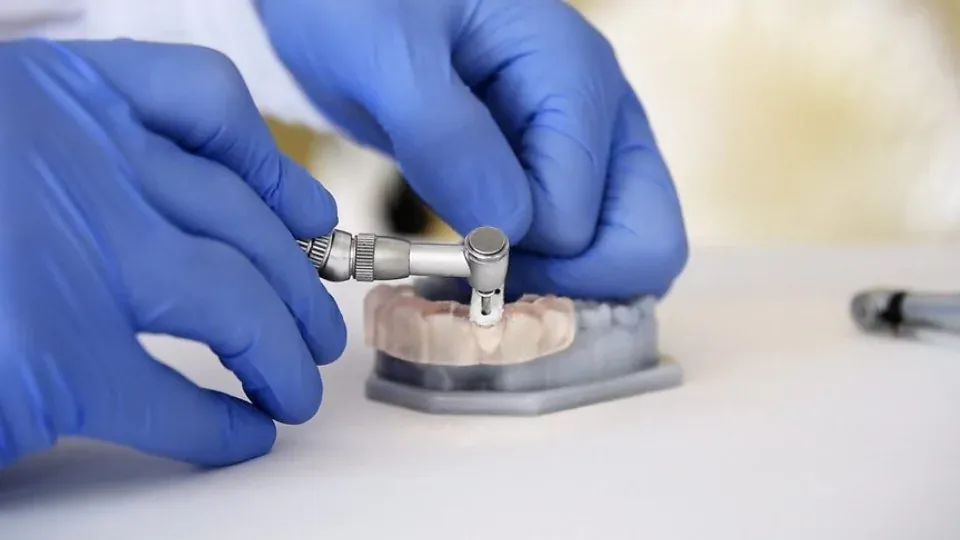
The STL file is sent to a 3D printer. Dental labs typically use highly accurate 3D printing technologies such as Stereolithography (SLA) or Digital Light Processing (DLP).
These printers use biocompatible resins that are specifically approved for medical use. These resins have properties that ensure the guide is strong, stable, and can be sterilized. Regular printer calibration and adherence to best practices are essential for achieving the highest levels of accuracy in the printed guide.
Post-Processing and Finishing Touches
After printing, the surgical guide undergoes several crucial post-processing steps:
- Washing and Curing: The printed guide is thoroughly washed to remove excess resin and then placed in a light-curing unit to fully harden the material.
- Drill Sleeve Insertion: The precise metal drill sleeves are carefully inserted and securely seated into the designated openings in the guide.
- Polishing and Quality Inspection: The guide is polished to remove any rough edges, ensuring patient comfort and ease of use.
Ensuring Accuracy and Reliability: Quality Control in the Lab
Accuracy is paramount in guided surgery. Dental labs implement rigorous quality control measures before a guide is sent to the dentist.
Verifying the Fit
The lab technician performs a fit verification. This means checking that the fabricated guide precisely fits over a master model of the patient's arch. Any discrepancies are identified and addressed immediately.
Checking Drill Sleeve Retention and Orientation
The security and correct orientation of the drill sleeves are meticulously checked. The sleeves must be firmly seated and aligned perfectly with the planned implant trajectory to ensure accurate drilling.
Sterilization Protocols and Packaging
Surgical guides are medical devices and must be sterile for patient safety. Labs follow strict sterilization protocols, often using specialized autoclaves or cold sterilization methods suitable for the guide materials.
The sterile guides are then carefully packaged to maintain their sterility until they reach the dental practice. Clear labeling with patient and case information is also crucial.
The Benefits for Dentists: Why Partner with a Digital Dental Lab
Choosing to partner with a specialized digital dental lab for surgical guides offers numerous advantages for dentists and their patients.
- Enhanced Precision and Predictability: Labs bring expertise in advanced planning software and 3D printing, resulting in guides that ensure highly accurate implant placement.
- Reduced Chair Time and Streamlined Workflow: With a precise guide, the implant placement procedure becomes faster and more efficient, reducing patient chair time.
- Minimized Surgical Risks: Surgical guides significantly reduce the risk of critical anatomical structure damage by directing the drill precisely.
- Improved Patient Confidence and Acceptance: Dentists can clearly show patients the planned implant position using digital models, increasing patient understanding and confidence.
- Access to Advanced Technology: Partnering with a lab gives dentists access to state-of-the-art 3D printers and complex planning software without significant capital investment.
- Expertise and Support for Complex Cases: Dental labs often have technicians with extensive experience in challenging cases, offering valuable support.
- Cost-Effectiveness and ROI: The efficiency, reduced complications, and improved outcomes often lead to a positive return on investment.
Future Trends in Surgical Guide Creation
The field of guided surgery is continuously evolving, promising even greater precision and efficiency.
Expect to see further refinements in materials, leading to stronger, more flexible, and potentially even clearer guide options. The integration of dynamic navigation systems with static guides will likely offer even more real-time control during surgery.
Additionally, advancements in software will continue to simplify the design process, making it more intuitive for technicians to create complex guides efficiently. The aim is always to push the boundaries of accuracy and patient safety.
Conclusion: Elevating Implant Dentistry Through Digital Lab Partnerships
The journey of how dental labs create surgical guides is a testament to the power of digital dentistry. From the initial digital scans to the final, precisely manufactured guide, every step is carefully executed to ensure optimal outcomes.
By leveraging advanced technology and skilled expertise, dental labs empower dentists to perform implant surgery with unparalleled precision, predictability, and patient safety. Partnering with a reputable digital dental lab is not just a convenience; it is a strategic decision that elevates the standard of care in implant dentistry.
Are you ready to experience the advantages of precision-guided surgery? Contact Guided Excellence today or submit your case to get started.